
Introduction
This is the second in a series of posts about our experience using Visual Studio Team Services (VSTS) to build a deployment pipeline for an ASP.NET Core Web Application. Future posts will cover release artifacts and deployment to Azure cloud services.
Prerequisites
It’s assumed that you have an ASP.NET Core project set up in VSTS and connected to a Git repository.
See the previous blog post for details.
Goal
The goal of this post is to set up your ASP.NET Core project to automatically build and run Unit Tests after every commit to source code repository (I.e. Continuous Integration).
Here is a video summarizing the steps described below:
Adding a New Build Definition
Log into VSTS. For this demo, The VSTS account that we will be using is https://ccpacetest.visualstudio.com, and the Microsoft user is CCPaceTest@outlook.com
Select the project from our previous post.
In VSTS, go to Build under the Build and Release tab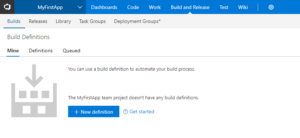
- Select “ + New Definition”
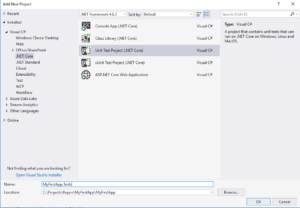
- Select ASP.NET Core Template

- Enter any Name that can help you to identify this build.
- Select an appropriate Agent queue. In this example, we will use Hosted VS2017. Use this agent if you’re using Visual Studio 2017 and you want the VSTS service to maintain your queue.
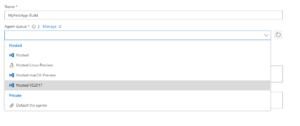
- To simplify the process, use the default value for other fields.
- Go to “Trigger” and Enable continuous integrations. This will cause a build to automatically kick off after every code commit.
- Save the definition.
Adding a Test Project to the Solution
- Open the solution (from the previous post) in Visual Studio.
- Add a new Test Project.
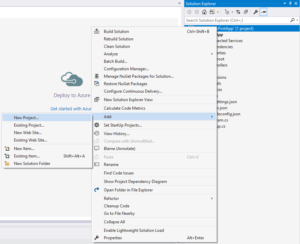
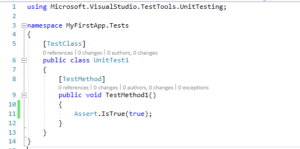
- Select .NET Core > Unit Test Project. We will name this project MyFirstApp.Tests. Note: the default build definition will look for test projects under folders that end with the word, “Tests“. So, make sure that a new folder that contains this word is created when you add your Unit Test Project.
- For a proof of concept, we are going to write a dummy Test Method. Enter the following code in UnitTest1.cs
- Rebuild the project.
- Commit the changes locally and push it to the remote source repo.
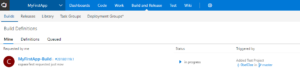
- Back in VSTS, you can see that a Build has been triggered.
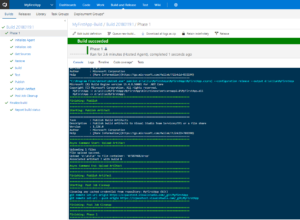
- Click on the build number #2018XXXX.X to view the details of the build. Normally this will take a few minutes to complete.
- Ensure all of the steps passed. You can click on each step to view log details.
What’s Next?
We’ll demonstrate how to deploy builds to different environments, either via push-button deployment or triggered automatically after each build (I.e. continuous deployment).
Stay tuned!