
Introduction
This is the first in a series of posts about our experience using Visual Studio Team Services (VSTS) to build a deployment pipeline for an ASP.NET Core Web application. Future posts will cover automated builds, release artifacts and deployment to Azure cloud services.
The purpose of this post is to show how to create a new Visual Studio Team Services, or VSTS, project, set up a Git code repository and integrate everything through your Visual Studio IDE.
Prerequisites:
- Microsoft Account (to be used to create VSTS Account) https://account.microsoft.com
- Visual Studio Team Services (VSTS) Account (Free version – 5 users)
https://www.visualstudio.com/team-services/pricing/ - Visual Studio IDE, Recommended 2015+ (Free version – Community Edition)
https://www.visualstudio.com/
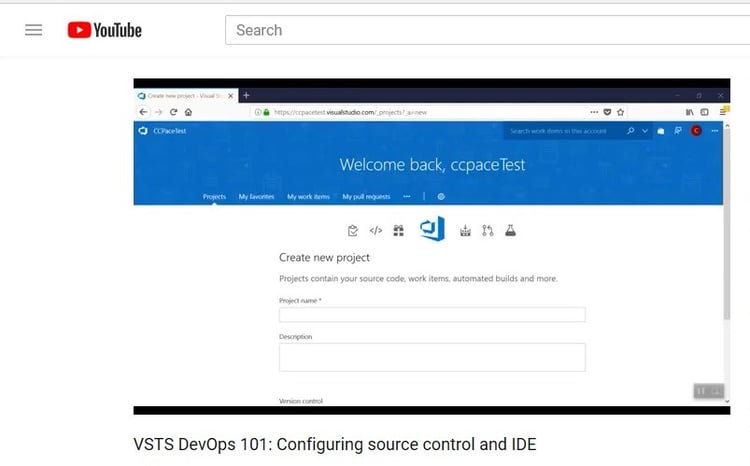
Here is a video summarizing the steps described below:
Creating a New Project
- If you haven’t already done so, create a VSTS account using your Microsoft Account. Your Microsoft Account is the “owner” of this VSTS account.
- Log into VSTS. By default, the URL should look like (VSTS account name).visualstudio.com. For this demo, The VSTS account that we will be using is https://ccpacetest.visualstudio.com, and the Microsoft user is CCPaceTest@outlook.com
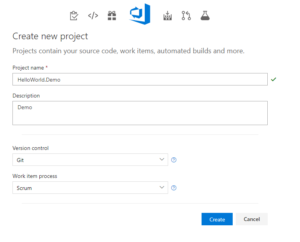
- Create a new project. This Microsoft Account is the “owner” of this project.
4. For this demo, we will select “Git” as our Version Control and “SCRUM” as the work item process.
Connecting VSTS Project to Visual Studio IDE
- There are many ways you can work on your project. A list of supported IDE’s is listed in the dropdown below. For this demo, we will use Visual Studio 2017 Professional Edition.
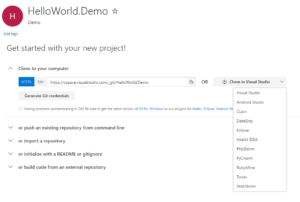
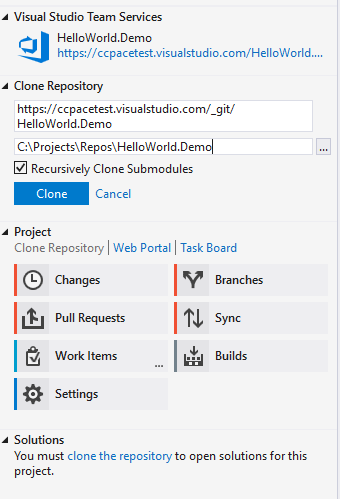
- Click “Clone in Visual Studio”. This will prompt you to launch your Visual Studio.
- If this is your first time running Visual Studio, you will be prompted to log in to your Visual Studio account. To simplify the process, log in to the Microsoft Account that you used to create the demo project previously. This should give you the admin access to the project.
- Go to View > Team Explorer > Manage Connection. Visual Studio will automatically show you a list of the hosted repositories for the account you used to log in. If you are following the previous steps, you should be able to see HelloWorld.Demo project. If you are not seeing a project that you are expecting to have access to, verify the account you log in to or check with the project owner to make sure you are given the right permission.
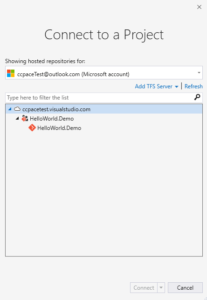
5. Connect to the project.
6. If this is the first time you are accessing this project in your local environment, you will be prompted to clone the repository to your local git repository.
Initial Check In
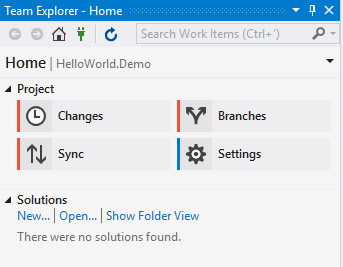
- Within the Team Explorer, click the Home button. Under the “Solutions”, select “new…”. Using this method will ensure the solution is added to the right folder.
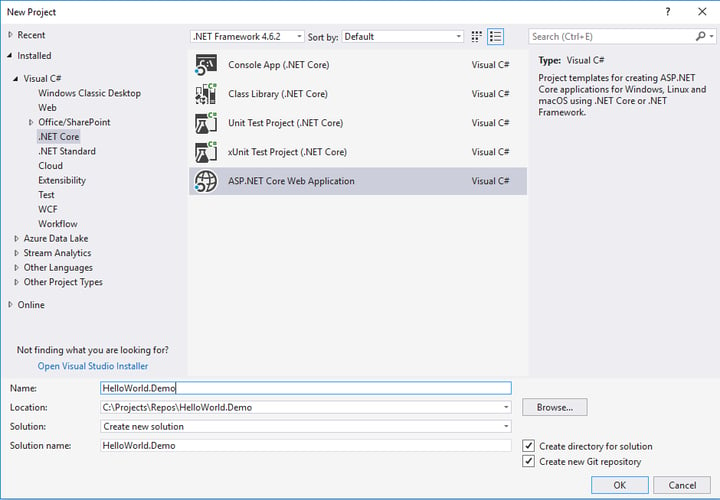
- For this Demo, we will create a new project using the ASP.NET Core Web Application template. The solution name doesn’t have to be the same as the project name in VSTS, but to avoid confusion, it is recommended to use the same name.
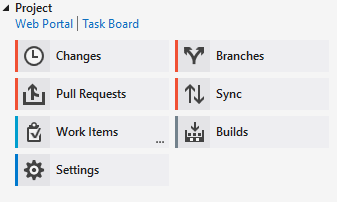
- Once the solution is created, go back to Team Explorer and select “Changes”, you should be able to view all the items you have just added.
- Enter a comment and click “Commit All”. This will update your local repository.
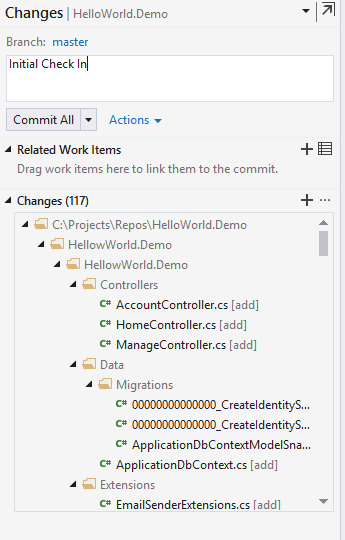
- To “Push” these changes to the remote Repository, click “sync”, and finally “push”.

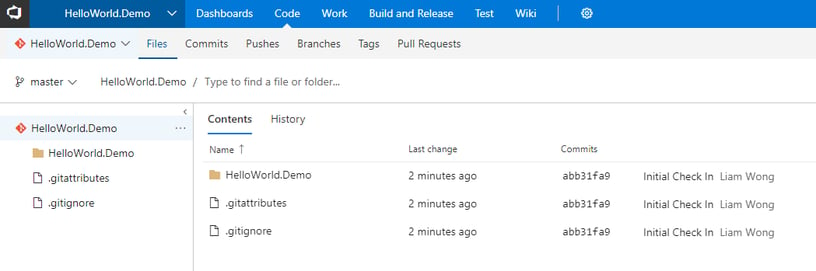
- You can verify this by logging into your VSTS, go to “Code” and you should be able to see all of the codes you have just checked in.
Collaborating with other Team Members
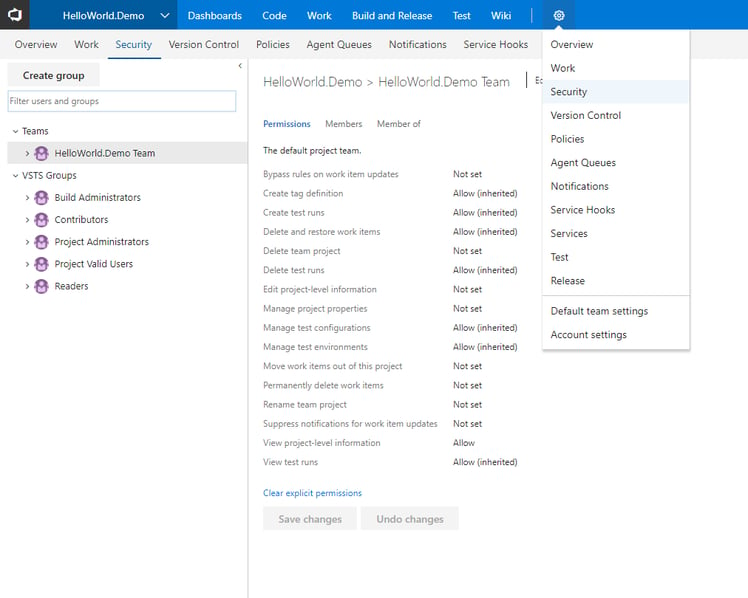
- You can add additional members to your project by going to the Settings > Security
- Please note that:
a: If your VSTS account is Azure Active Directory backed, then you can only add email addresses that are internal to the tenant.
b: You must add email addresses for users who have “personal” Microsoft accounts unless your VSTS account uses your organization’s directory to authenticate users and control account access through Azure Active Directory (Azure AD). If new users don’t have Microsoft accounts, have them sign up.